APPlesauce: Paper

There’s an exciting new development in the Hey Lucy household. Mr. Heylucy is the proud owner of an iPad Mini. It was an anniversary-birthday-Christmas present. I have been ignoring it, because I didn’t think I really had any need to use it, but he is very generous and keeps downloading apps he thinks I might like, and is very happy to share it with me. So I’ll start including the occasional iPad app review, along with my usual iPhone app reviews. I knew there were lots of iPad-specific apps, of course, but we’ve discovered some really beautiful ones that would never work on a little iPhone screen, so I’m really excited to start sharing them here!

My current favorite is called Paper, which you’ve probably heard of if you have an iPad, since it was just named App of the Year. I like it so much that I’m going to write about it anyway. I have a few drawing apps on my phone, but I never use them. They are really powerful and have tons of capabilities, and I’m sure they’re really great, but I find them just too intimidating for my non-artist self. So I had my doubts the first time I opened up Paper. I didn’t buy any of the extra tools at first, the free version comes with just a pen tool, but I starting just making swirls and lines on the page and knew that I had to have all the tools. There’s something about the way the app works that makes all my doodling look good.

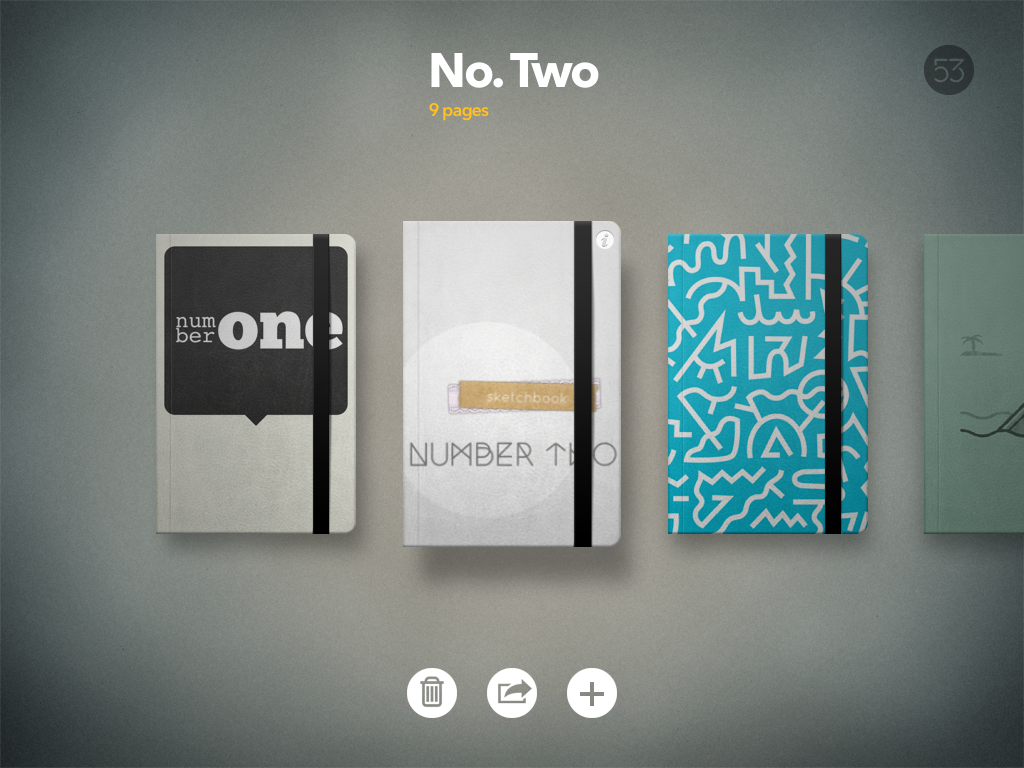
Paper is beautifully designed, and opens with an assortment of Moleskine-like notebooks, which you can name and customize as you like. I had fun making covers using Phonto and Poolga wallpapers. You can re-order the notebooks, and add and remove pages, or move pages from one book to another.

paper app

The drawing interface is very simple and intuitive. Choose your tool and just start creating. The color palette is also very easy to use. There are several pre-set color palettes, and you can adjust the color in the large mixing palette to anything you’d like, and then move those colors over to your own palettes. You also have the ability to blend colors, which makes it easy to make the colors in your work of art all cohesive.

flowers

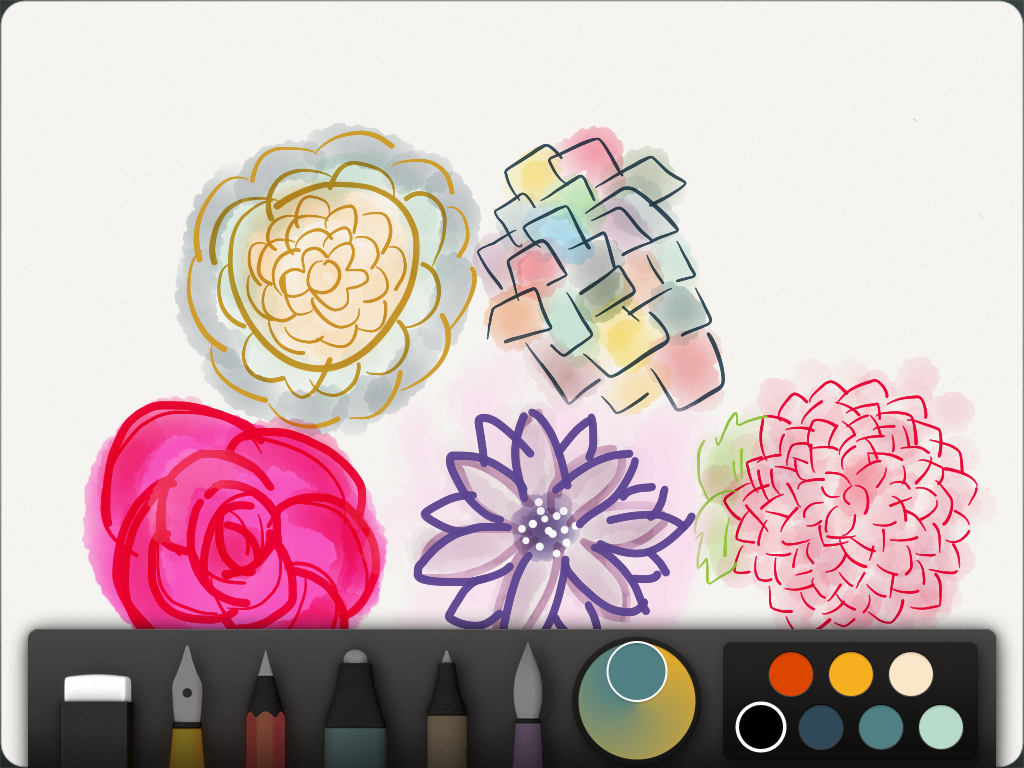
There’s an eraser tool, but you can also undo your work by making a circle gesture with two fingers and “rewind” your last strokes (up to 20, I believe). I’m still no artist, but Paper is so easy to use that I am drawing more. Here’s an evening’s worth of sketches:

paper sketchbook

more sketches

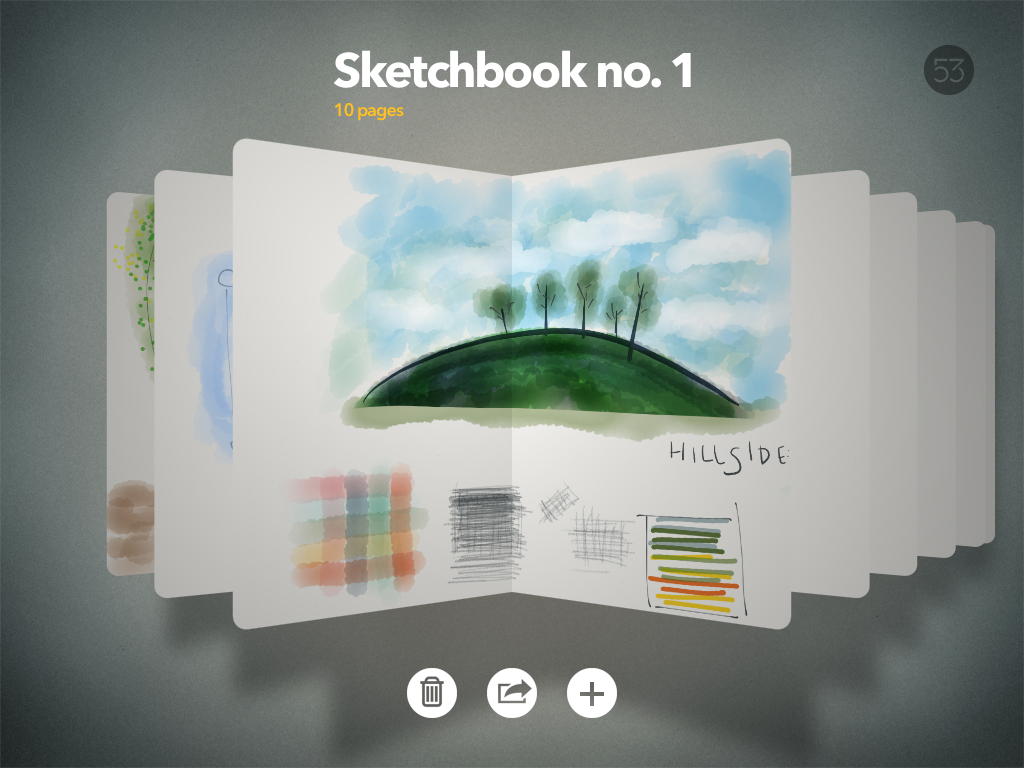
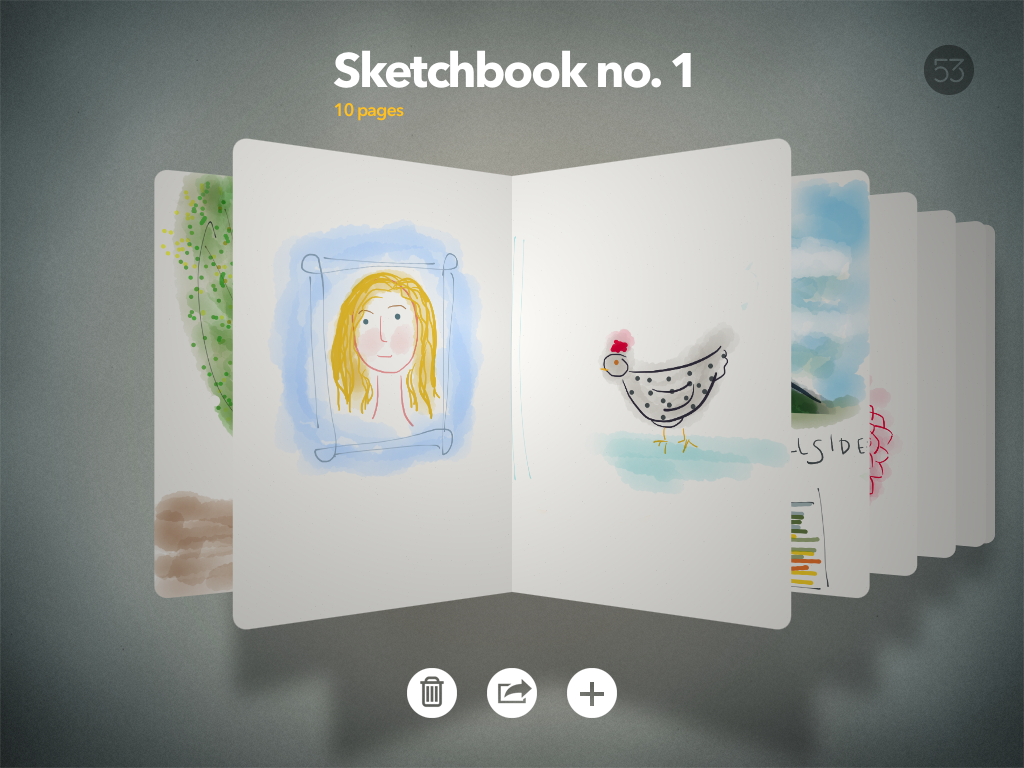
I’m still doing lots of experimenting, but it’s so satisfying to watch my little notebooks fill up with color and lines. There are so many uses for this app, not just drawing, but note-taking, journaling and creating idea repositories.

The creators of Paper have a tumblr blog, showcasing art created with the app.

The Paper website.

Get it in the App Store:
Paper by FiftyThree - FiftyThree, Inc.

Read More

how to: make a pattern repeat in Photoshop

In an effort to make Hey Lucy more interesting and useful, I thought I’d make more of an effort to share more how-to’s and tutorial type stuff. I may even try to get around to finishing up that sewing class idea I had once upon a time. I have been flakey this year, and I am sorry about that. When I get stressed out (and this has been a pretty stressful year), I tend to get flakey. I am going to do better. So, how about a quick guide to making a repeating pattern with Photoshop?

I am not in any way an expert when it comes to Photoshop. I just learn new things as I need to. While re-doing my site I found the plain background a little boring, so I decided to make an image that I could tile. I love the way it came out, and it was so easy. I’m not sure if this is the proper way to do it, but it worked for me and just took a couple minutes. I have Photoshop CS5, but I think this will work for most versions.

You’ll need an image to use for your repeat. I used this little bird, that I found on the Graphics Fairy website. She has lots of fun, vintage images you can download. Open the image you want to use and also create a new, square image. I made mine 300px x 300px. I added a background color, you could also do a transparent background.

new image

Go to the image you want to use and copy it (I used the magic wand tool to select the background of my image file, and then went to Select > Inverse to only select the birdie). Add a new layer to the new image you created and paste your image there.

Screen Shot 2012-12-15 at 9.01.51 AM

Adjust the size of the copied image, if necessary, using the Transform tool (Edit > Transform > Scale). Now add some guidelines by going to View > New Guide. Add a horizontal and a vertical guideline to the center of your image. Because my image size was 300px square, my guidelines are at 150px.

Screen Shot 2012-12-15 at 9.02.45 AM

Once your guidelines are in place, go to Edit > Free Transform (Mac: Command-T; PC: Control-T). Use the bounding box that appears to center your image. The center squares will snap neatly to the guidelines. Hitting Esc or Enter on your keyboard will set the image in place and dismiss the bounding box.

Screen Shot 2012-12-15 at 9.03.18 AM

Now copy that layer, so you have two birdies, right on top of each other. Select one of these layers and go to Filters > Other > Offset. Change the numbers in the Horizontal: and Vertical: boxes to half the size of your image. Again, since my image is 300px, I offset it by 150px. Click OK.

offset filter

And there you go, you have an image that will tile perfectly. I changed the opacity on the bird layers to about 10%, and then flattened the whole thing and saved it as a .jpg for the background here.

Screen Shot 2012-12-15 at 9.05.01 AM

Isn’t that easy? It’s not a super fancy or complicated background, but I like it.

Read More

puppy

pixel

I haven’t taken enough pictures of Pixel. Here he looks so sweet and innocent, doesn’t he? We just started going to training classes, and he’s catching on, I just need to work harder at being consistent with him. As I’ve been sitting here editing his photo and writing, he’s been barking at Winston for stealing his chew toy. Ahh, puppies.

I’ve still got a lot of cleaning up to do, but I’m happy enough with the site as it is for now. I still have all the pictures from my missing posts, so I may try to duplicate some of them. Things have looked a little messy around here lately, though, so I think I’ll look on this disaster as a chance to start fresh. I might even go through and delete some of the more whiney posts from past years.

p.s. I used the apricot glow action from besotted blog on the photo. I like what it does for my little guy here, isn’t it pretty?

Read More

technical difficulties

I got creative and did some dumb things and managed to pretty much delete my whole site. Isn’t that terrific? It’s been a rough week, but I am trying to fix it and I’m giving Hey Lucy a little facelift while I’m at it. It was easy enough to import all my old posts from my typepad days, but I might have lost most of what I’ve written here for the past few months. A fresh start is always good, right? So please excuse the mess, I hope to have it all cleaned up in the next day or so. If I don’t suffer from a concussion due to banging my head against the wall.

Read More

some things to do with iPhone photos

At any given time I have hundreds of photos on my phone. It seems a shame to just leave them there, but it always seems like so much work to do anything else. Well, actually, it’s not really. There are several really easy ways to transform those memories and little works of art from electronic media to real life photos, which are much more fun to look at and share, and there are tons of fun ways to display your photos once you get them in your hot little hands.

Postal Pix

First up is PostalPix, a free iPhone app (and coming soon for Android!) that makes ordering photo prints right from your phone really easy and inexpensive. The service is also really fast, shipping is reasonable, and you can even use PayPal to pay for your prints. The last order I placed got to me in just a few days. They offer a nice variety of sizes, including square prints (4×4, 5×5, and 8×8!), which means they can print Instagram and Hipstamatic photos, no problem. They also print standard sizes up to 8×10. I’ve ordered from them a couple times now, and I’ve been very pleased with the quality. The paper is nice and sturdy, with a matte finish. I’ve even downloaded some of my Nikon photos to my phone from my flickr account, and had those printed and they came out absolutely crisp and clear, and were nice enough to frame!

Here’s what I did with some of my Instagram prints from Postal Pix:

Postal Pix encaustics

I’ve heard of encaustic painting before, but reading this post inspired me to give it a try with some of my photos. I ordered some 5″ x 5″ boards from Dick Blick, and I had some beeswax, so that’s what i used. I definitely need to practice my technique, I messed up a couple prints because I think my iron was too hot and I probably held it in place for too long. Still, I had plenty of successes too. I like the warmth and texture that the beeswax added.

more encaustics

PostalPix also offers aluminum prints, which are so nice. They are a bit pricier, but I ordered this 4×4 print of a photo I took while in Africa, and I love the way it looks. It’s nice and sturdy and seems to be scratch-resistant. The finish is smooth and slightly glossy. I like that it’s something different, and doesn’t need framing. I made a quick little stand for it with a chunk of wood from the yard. I sanded it a bit and then just pounded in a few nails-two in front and one in back. I have a scrap wood/stick thing going on, as you’ll see throughout this post.

aluminum print

Another free iPhone (and Android) app is Postagram. With Postagram you can order postcards, and have them sent anywhere in the world. What’s nice about Postagram is that you can choose not only photos from your camera roll, but also photos directly from Instagram and Facebook.

Postagram postcards are also nice, heavy cardstock, with a glossy finish. You are limited to only square photos (which you scale and crop as you place your order, if they are not already square), but the photo itself can actually be popped out of the postcard for display. You also have the ability to add a personalized message and your own little avatar. For just 99 cents, it’s a nice way to send a greeting to a friend, with the bonus of a nice photo they can save and display.

Postagram is powered by Sincerely, which is also behind the lovely Cartolina Postale app I talked about earlier this year, and several other printing apps that look fun, like Popbooth. You can also buy credits and add contacts to your address book online, to make checking out from your phone even quicker and easier.

Printstagram lacks the convenience a standalone app, but it makes up for it with the variety of products. To order from Printstagram, you’ll need to go to their website and connect to your Instagram account. Then you can choose from a variety of products, from square prints-in two sizes, to stickers, mini books, posters and more. I ordered a set of the mini prints, and chose all my Africa Instagram pictures, plus a few others. They are business card-sized, and extra thick and sturdy. They came nicely packaged in a little brown box, but at the time they took quite a long while to get here, it was a good three weeks or so, and I’m not sure that they are shipping faster yet. While the company is based in California, their products are actually printed and shipped from Hong Kong. You also don’t have the option to order just a print or two, you have to order in the quantities they specify. Still, the quality is good and their products are unique, so if you’re not in a big rush, they are worth the wait.

Printstagram tiny cards

I’m using most of my little prints in a scrapbook, but I wanted to display a few around the house as well. I found some more bits of wood and a few bulldog clips. I had some fun with paint and finishing wax, and used someCommand Picture Hanging Strips for hanging (I only recently discovered these handy little things, I love them!).

display stick

wood block photo holder

Do you need a little more iphoneography inspiration? I thought this was nice:

iPhone shooting techniques


Whew! That was a long post with a lot of photos. I hope it was helpful! Has anyone else been printing photos from their phone? Do you have a creative display idea to share?

Read More

have a seat

This project didn’t actually make it to my undone list, because it was so close to being finished that I didn’t think it counted. Plus, I am going to blame the delay on the craft store stencil thieves. Can you believe there are actually people who want to stencils so badly that they are willing to risk jail time? There’s an ugly craft world underbelly out there. These are their stories (insert Law & Order sound effect).

stenciled chair

Bonus shot of Pixel scrounging for food in the background.

I was checking out the Martha Stewart paint aisle at Michael’s recently, and saw her line of stencils. They are much nicer than your typical craft store stencils, and I particularly liked this lace set. I’ve had this chippy chair sitting on the porch forever, and it wasn’t the nice kind of charming vintage chippy, it just looked bad. I had also recently pinned some painted and stenciled chairs, and so all this inspiration came together, and I bought my little stencil set and went happily on my way, blissfully unaware of the stencil drama to come (okay, I may be overstating this a bit, it wasn’t actually very dramatic, just inconvenient, really).

stenciled chair seat

I sanded and sanded my chair, and got a reasonable amount of the paint off. Then I just taped it off and painted a little over half of it with a couple coats of semi-gloss white paint. I eagerly applied the big lace stencil in bright pink and got ready to do the smaller lace stencil when I discovered that my package was missing one of the sheets. Armed with my receipt and incomplete (and now used) stencil package, I went back to Michael’s to exchange it for a complete set. When I went back to the aisle for a replacement I found only one other package of the same stencil pattern, only this time, not one but all three sheets were missing! I want to know how one smuggles a stencil out of the craft store. I wouldn’t think you’d want to fold them up, and these things are pretty big. Plus, they are just not that expensive and you can always get a 40% off coupon. Anyway, the manager was quite nice and called a nearby store for me. They had it in stock and had it sent over for me to pick up the next day. Just don’t be surprised if the stencil aisle now has video cameras monitoring you as you shop, and for goodness sake, check the package before you buy it to make sure they are all there!

stenciled chair with cushion

Back to my chair…I finished with the smaller lace pattern in blue and then sealed the whole thing with a wax finish, so it’s still a little chippy on the unpainted side, but it’s nice an smooth. I totally love it and now I want to stencil everything in sight. I will try to restrain myself.

Cushion is from Pier 1, but I don’t think it’s available any more.

back of stenciled chair

stenciled chair

One project down, seven (or more) to go.

Read More

just in case…

…you didn't know, it's peony season!

image from flic.kr
I hope you are able to enjoy some peonies in your life, but do hurry, they will be all gone way too soon!

image from flic.kr
I look forward to them all year long.

image from flic.kr

Read More